White-background product photography answers one question: what does this thing look like? Lifestyle photography answers a different and more profitable one: what does my life look like with this thing in it? Research by BigCommerce found that 78% of online buyers prefer product images showing products in real-life settings, and consumers are three times more likely to purchase when retailers provide rich in-context imagery. The problem is that lifestyle photography looks expensive — and most sellers assume they need a professional shoot. You don't. You need the right scene for your product. This guide walks through six realistic scenarios, each with a budget and a shot list.
Why Lifestyle Images Outperform Pure Studio Work
Studio shots on white sell clarity. Lifestyle shots sell desire. The combination converts better than either alone. UK e-commerce brands that blend studio and lifestyle approaches report average conversion rate improvements of 30-40% over studio-only listings, and home goods pages with lifestyle photography consistently beat white-background-only pages.
The shopper reads a listing in a predictable sequence:
- Hero image (main): pure product, answering "what is it?"
- Scale reference: product with something for size context, answering "how big?"
- Lifestyle scene: product in use, answering "is this for me?"
- Detail / infographic: specs and features, answering "is it good quality?"
- In-use steps: how it's used, answering "can I handle this?"
Lifestyle images carry slots 3 and 5. Skip them and the buyer makes assumptions — usually unflattering ones.
Pick Your Scenario
Your product category and budget shape which scene to build. Pick the scenario that matches your situation and follow the specific setup. Don't default to a generic flat-lay if your product lives in a kitchen or on a body.
Scenario A: The Desktop Scene (Budget: Under $100)
When this fits: Small to medium products that sit on surfaces — kitchenware, office supplies, books, small appliances, accessories, beauty products, tech gadgets.
What you need:
- One textured surface: wood board (IKEA cutting board, $15), marble-look contact paper on a flat board ($10), or a clean desk you already own
- Two to three props that imply context without stealing attention: a mug, a linen napkin, a plant, a notebook, a pair of glasses
- Natural light from a large window, or a $40 LED panel with diffusion
- White foam board ($5) as a reflector on the shadow side
The shot list:
- Wide establishing shot: product plus 2 props arranged in a triangle, some negative space
- Medium shot: product as the focus, one prop barely visible in the background
- Hand-in-frame: a hand touching or using the product (adds human context without needing a model)
- Top-down flat lay: product with props arranged geometrically, useful as a secondary Amazon image
Anti-pattern to avoid: Loading the frame with eight props. The product should occupy 40-50% of the visual weight, not compete with five other objects. Strip until the product is clearly the hero.
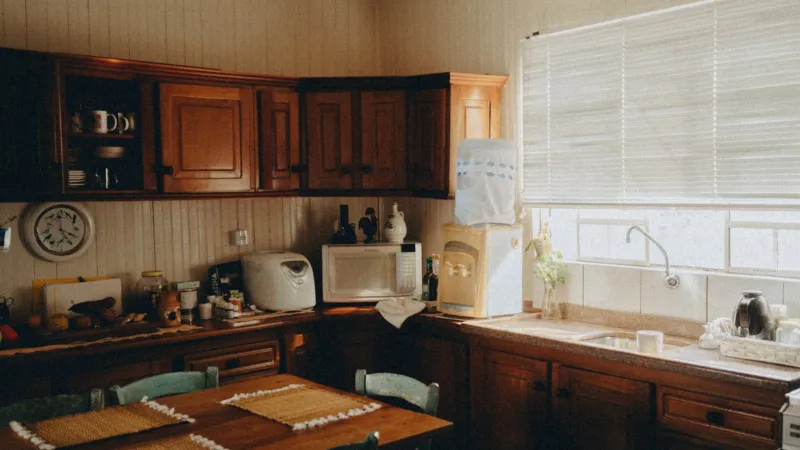
Scenario B: The In-Home Scene (Budget: $0-50 if you have a livable home)
When this fits: Home goods, textiles, decor, cookware, small furniture, organization products, cleaning supplies.
What you need:
- A section of your home that reads as "put-together" — doesn't need to be magazine-perfect, but clutter-free and well-lit
- Natural window light (north-facing windows give the softest light; avoid direct sun)
- Your own styling: make the bed, clear the counter, add one plant, remove the visible-brand electronics
The shot list:
- Product in its native room (cookware on a stovetop, throw pillow on a couch, candle on a coffee table)
- Product being used or just-used (freshly poured tea in the cup, folded towel on a bathroom shelf, plant recently watered)
- Wide-angle of the room with product in natural position (~1/4 of frame)
- Detail crop showing texture and how it reads in the space
Anti-pattern to avoid: Obviously staged setups that no one lives in. A coffee mug with zero coffee in it on a perfectly bare counter in harsh overhead light signals "stock photo," not "real kitchen." Real use = real props.
Light rule: Shoot between 10am-2pm with a window as your main light source. Turn off all interior lights — they create color cast. Use a white sheet on the shadow side as a bounce if shadows are too harsh.
Scenario C: The On-Model Fashion Shot (Budget: $100-500 per shoot)
When this fits: Apparel, accessories worn on the body, bags, watches, jewelry, hats, shoes.
What you need:
- A person whose body shape matches your target customer's average (not the smallest possible size)
- A space with soft natural light and a neutral wall or backdrop
- A photographer or a tripod with a remote shutter if you're shooting yourself
- Hair and basic makeup — nothing dramatic, just "looks intentional"
The shot list per garment:
- Full body front: product on model, natural pose, facing camera
- Full body back/side: shows how it drapes
- Half body detail: closer crop showing fabric, neckline, or key feature
- In-motion shot: model walking, turning, sitting — shows movement in the fabric
- Close-up of material: no model, just the garment to show texture and hardware
The size question: Fashion returns are dominated by size issues. A single on-model shot can't solve that — you need measurements too. Annotate at least one image with key dimensions (chest, length, sleeve), or include a size chart image in the gallery. On-model shots alone leave buyers guessing about fit.
Anti-pattern to avoid: One model at one size. If your sizing runs S-XXL, show the product on at least two different body types. Single-model shoots correlate with higher return rates because buyers can't gauge how the garment will fit them.
Scenario D: The Outdoor / Activity Scene (Budget: $0-200)
When this fits: Sporting goods, outdoor gear, pet products, travel accessories, fitness equipment, water bottles, hats, sunglasses.
What you need:
- A location that reads as "outdoors / active" but isn't distracting: park, local trail, your backyard, beach, urban sidewalk
- Natural light at golden hour (1 hour after sunrise or 1 hour before sunset) or overcast midday
- Subject or model using the product naturally
The shot list:
- Environmental wide shot: product being used with location context readable in the background
- Action shot: person mid-motion with the product (walking, climbing, running, playing)
- Detail close-up: product's key feature against the natural setting
- Stationary hero: product alone in the location (no person) — works as a lifestyle transition shot
Weather and light rule: Shoot on overcast days for the easiest lighting. Harsh midday sun blows out highlights and creates deep shadows that obscure product details. Overcast = soft, even light that flatters most products.
Anti-pattern to avoid: Location that fights the product. A camping knife photographed on a hiking trail: good. A camping knife photographed in a neon-lit urban alley: confusing context that hurts believability.
Scenario E: The Studio-Lifestyle Hybrid (Budget: $50-300)
When this fits: You need lifestyle-feeling images but can't shoot on location — products with regulatory constraints (food, supplements, cosmetics), products that need sterile-looking scenes (medical, technical), or products where your team can't access varied locations.
What you need:
- A seamless backdrop in a neutral color (gray, tan, or subtle color) — 9ft roll of seamless paper is ~$40
- Two lights with softboxes or diffusers — can be $40 LED panels with DIY diffusion
- A few textural props that imply environment without being environment: a folded linen cloth, a plant in frame, a wood board as a surface
The shot list:
- Product on textured surface against neutral backdrop (implies an upscale home without showing a home)
- Hand-in-frame using the product (human element, no full person)
- Product with 1-2 in-category props (a knife with a tomato, a watch on a linen napkin, a candle beside matches)
- Flat lay against the seamless background
Why this works: Gives you the "in-context" feel without the complexity of a real location. Particularly useful for beauty, food, health, and tech categories where a real-world scene introduces issues (dust, hygiene concerns, regulatory messaging).
Anti-pattern to avoid: Plain gray backdrop with zero textural elements. Without a hint of environment (wood surface, linen, plant, hand), these shots feel clinical — closer to studio product photography than lifestyle. Add one environmental cue per shot.
Scenario F: The User-Generated Content Approach (Budget: Near-zero)
When this fits: You have existing customers, limited budget, products that are genuinely loved by their users, fast-turnover categories where professional shoots don't amortize.
What you need:
- An outreach process to request photos from real customers (email, influencer-style arrangements, review incentives)
- Clear usage rights — never use customer photos without explicit written permission
- A consistent light edit to make different photos feel like they belong to the same brand
The shot list you're asking customers for:
- Product in their home / natural use environment
- A "unboxing" or "first use" moment
- Product alongside complementary items they already own
- Written permission for commercial use
Strengths: Authentic, low-cost, trust-building. Buyers recognize real-world scenes vs. staged ones and respond better to them for certain categories (home decor, apparel, beauty).
Weaknesses: Image quality varies. Composition is unpredictable. You'll cull 80% of submitted photos. Not suitable as your primary listing image — best used as supplementary images or in A+ content.
Anti-pattern to avoid: Using customer photos without explicit permission. Amazon and Shopify will remove listings if a buyer reports unauthorized use of their photo, and the legal exposure is real.
Decision Matrix: Which Scenario Fits Your Product?
| Product category | Primary scenario | Secondary scenario | Budget tier |
|---|---|---|---|
| Kitchenware | Desktop or In-home | Studio-hybrid | Low |
| Apparel (casual) | On-model | In-home (folded/styled) | Medium |
| Apparel (performance) | On-model outdoor | On-model studio | Medium-high |
| Home decor | In-home | Desktop scene | Low |
| Cookware | In-home (on stove) | Desktop | Low |
| Beauty / skincare | Studio-hybrid | Desktop | Medium |
| Tech gadgets | Desktop | Hand-in-frame use | Low |
| Outdoor / camping | Outdoor activity | Studio-hybrid for details | Medium |
| Pet products | Outdoor / in-home | Hand-in-frame with pet | Low |
| Jewelry | On-model close-up | Studio-hybrid with prop | Medium |
| Baby products | In-home | On-model (with adult hand) | Low-medium |
| Fitness equipment | Outdoor or in-home | On-model action | Medium |
The Three Rules That Apply to Every Scenario
No matter which scenario you pick, these three rules determine whether the image converts:
Rule 1: The product is the hero. If a viewer can't identify your product within one second of seeing the image, the composition is wrong. Product should be 40-60% of visual weight.
Rule 2: The scene supports the product. Every prop, every environmental detail, should reinforce who the product is for. A minimalist ceramic vase in a cluttered maximalist room sends mixed signals about the customer.
Rule 3: The light is soft and directional. Harsh overhead light flattens everything. Soft directional light (natural window or diffused artificial) creates dimension and makes products look premium. This one variable explains most of the gap between amateur and professional-looking product photos.
Should You Use AI-Generated Backgrounds?
AI image generation is increasingly used for lifestyle backgrounds — shoot the product on a clean background, then place it in an AI-generated scene. Current state (2026):
Works reasonably well for: Simple rooms, outdoor settings without specific regional characteristics, studio-like environments, shallow-depth-of-field shots.
Still struggles with: Scenes with people (hands, faces, proportions), reflective or transparent products, scenes where the product interacts with the environment (steam from a coffee cup, wet surface under a bath product), high-end categories where authenticity matters.
Practical rule for 2026: Use AI backgrounds for secondary supporting images. Use real photography for hero lifestyle shots where believability matters most. The technology is improving fast, but buyers can still detect AI scenes, and for premium positioning that detection reads as "cheap."
Pre-Shoot Checklist
Before every shoot, run through this:
- Which scenario matches this product category
- Props gathered, matching the product's visual tone
- Light source identified and tested (window location, or artificial setup)
- Backdrop or surface prepared, no clutter visible
- Camera settings tested at actual shooting distance
- Shot list written — no improvising on set
- Color reference checked (shoot a color card if color fidelity matters)
- Post-processing plan: same adjustments across all images in the set for visual consistency
Next Steps
Pick one scenario that fits your best-selling product and plan a single focused shoot this week. Don't try to nail all six scenarios at once — that's how sellers end up with a messy library of inconsistent images. Steps to follow:
- Pick your scenario based on the decision matrix
- Gather props and set up the space from the shot list
- Shoot 15-20 variations per product, pick your top 3-4
- Edit consistently — same color grading, same crop style
- Integrate into your listing alongside existing studio shots
If your product's primary purchase friction is around size rather than aspiration (most apparel, furniture, bags, kitchenware), consider adding dimension-annotated images to your gallery alongside the lifestyle shots. Dedicated annotation tools produce cleaner measurement overlays than generic design software, and paired with good lifestyle photography they cover both the emotional and practical sides of the buying decision. Either approach — standalone lifestyle or lifestyle plus dimension overlays — beats studio-only listings in almost every category.
FAQ
Do I need a model for lifestyle shots?
Not always. Hand-in-frame shots provide human context without the cost and coordination of a full shoot. Full-body models are needed for apparel, jewelry, and body-worn accessories where fit matters. For kitchenware, home decor, tech, and most categories, hands (or no human at all) work fine.
Can I shoot lifestyle photos with just my phone?
Yes for most categories. Modern smartphones (iPhone 15 Pro and later, Pixel 8 Pro, Samsung S24 Ultra and later) produce commercially acceptable results when combined with good natural light and basic composition discipline. The camera is rarely the limiting factor — light and composition are.
How many lifestyle images should a listing have?
2-3 lifestyle images out of your 7 image slots. Mix at least one scene-focused shot with one in-use shot. More than 3 tends to dilute the gallery's clarity — buyers still need studio shots, infographics, and dimensions.
How much should I budget per product for lifestyle photography?
Under $100 for a desktop or in-home scene if you have basic equipment. $100-300 for a medium-budget shoot with a model or outdoor location. $300-1000 for a professional studio-hybrid shoot with dedicated lighting. Most sellers can produce commercially usable images at the low end; the higher tiers are about scaling consistency across a large catalog.
Should lifestyle images match my website's aesthetic or Amazon's style?
Both, by keeping them consistent across channels. A lifestyle image that works on your Shopify site usually works on Amazon too — the category restrictions are mostly about the main hero image (Amazon requires pure white background there). Secondary slots on Amazon accept the same lifestyle images you use on your website.
Sources & References
- E-commerce Product Photography — BigCommerce
- The 7 Types of Product Images (Cut-Out vs. Lifestyle) — Baymard Institute
- Photos as Web Content — Nielsen Norman Group
- See It, Snap It, Buy It: Visual Search & Product Imagery — Think with Google
- DIY Guide to Product Photography — Shopify
- E-commerce Photography Trends 2026 — West London Studio