
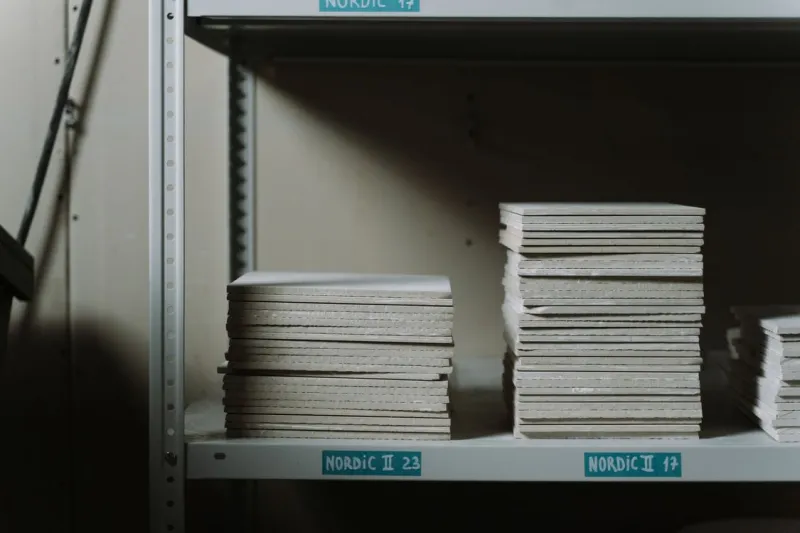
Your tile photo never says the size — and that costs you inquiries
Your tile photo never states the actual size, thickness, or tolerance — so how to label building material dimensions is a sales problem, not a design one, and your product image is where you win or lose the inquiry. A contractor sizing a floor, an importer filling a container, a fabricator ordering panels: none of them can act on a glamour shot. They need the labeled numbers. When the image withholds them, you get an email asking "what's the real size?" instead of a purchase order — and half those emails never come.
Building materials make this worse than any other category, because the number you print is almost never the number a caliper reads. A "2x4" is 1.5 by 3.5 inches. A "3/4-inch" plywood panel is 23/32 inch. A "600 mm" tile is 598 mm. These are not errors; they are standards. Show only the nominal name and hide the actual size, and the buyer either walks or measures it himself — and a contractor cannot spec what he has to email you to measure.
This is a reference by material — tile, plywood and panels, dimensional lumber, brick and block, and profiles and pipe. For each, you get the dimensions buyers need labeled, the standard and tolerance nuance behind them, and how to put them on the image. A nominal vs actual dimensions mismatch is the most common reason a technically correct product looks wrong to a buyer.
First, define nominal vs actual size and tolerance
Two definitions carry this whole article, so pin them down before you label building material dimensions on anything.
Nominal vs actual size. A nominal dimension is a rounded, standardized label used to name a product — a "2x4," a "3/4-inch" panel, a "DN50" pipe. An actual dimension is the real measured size after manufacturing — 1.5 x 3.5 in, 23/32 in, 60.3 mm outside diameter. In building materials the two rarely match, because nominal sizes are legacy names, modular-coordination figures, or a size the material had before drying, planing, sanding, or a mortar joint was accounted for. Print the nominal name alone and you have told the buyer what to call the product, not what he will receive.
Dimensional tolerance. A tolerance is the permitted range a real part may vary from its stated size and still comply with the standard — for example ±1/32 in (±0.8 mm) for a sanded plywood panel, or the work-size and caliber bands that ceramic tile is sorted into. Tolerance is not sloppiness; it is the contract. A buyer specifying a tight installation needs the tolerance class on the image, not a promise of perfection you cannot keep.
Put both on every product image and in every building material spec sheet, and most pre-sale questions disappear before they are typed.
Ceramic and porcelain tile: label work size, not just nominal
Tile is where the nominal-versus-actual trap bites first, because the industry openly separates the two. Under ISO 13006 and its European twin EN 14411 (ANSI A137.1 governs the same territory in North America), a tile has a nominal size, a work size (the intended manufacturing dimension), and an actual size (what it measures). A tile sold as 600 x 600 mm typically has a 598 mm work size — the 2 mm is deliberate, leaving room for the grout joint. That is compliant, not defective.
For correct tile size labeling, put four things on the image: nominal size (e.g., 600 x 600 mm / 24 x 24 in), work size or actual size, thickness (commonly 9-11 mm), and whether the tile is rectified (mechanically squared to a tight edge) or pressed with a natural cushion edge. Calibrated and rectified tiles carry tighter dimensional tolerance, and a buyer laying a minimal 2 mm joint must know which he is getting.
The common mistake is printing only "24x24" and leaving out the work size, thickness, and edge type. A specifier then assumes a full 610 mm and a rectified edge, orders, and finds a 598 mm cushion-edge tile that needs a wider joint. Link buyers to your standard tile sizes reference so nominal and work size sit side by side, and there is nothing left to email you about.
Plywood and wood panels: the nominal thickness lies
No category burns buyers on thickness like panels. A nominal "3/4-inch" plywood sheet actually measures 23/32 inch — 0.71875 in, about 18.3 mm — because the pressed panel is sanded on both faces and loses roughly 1/32 inch. Under the U.S. plywood standards PS 1-22 (structural) and PS 2-18 (performance), a sanded panel carries a thickness tolerance of about ±1/32 in (±0.8 mm) from that actual figure, per APA - The Engineered Wood Association.
For plywood sheet dimensions, label the nominal thickness and the actual thickness together (3/4 in nominal / 23/32 in actual / ~18.3 mm), the full face size (nominal 4 x 8 ft, 1220 x 2440 mm — some panels run a hair under), and the grade or span rating that tells the buyer what the panel is engineered to do. A cabinetmaker cutting dados to 23/32 in and a buyer who ordered "a full 3/4 inch" are two different unhappy phone calls.
The common mistake is a product image that says "3/4 inch plywood" and stops. State the actual thickness on the image, because that is the number that decides whether the panel fits the groove, the hardware, and the stack height — the clearest case in the catalog where nominal vs actual size decides a sale.
Dimensional lumber: label the dressed size, not just the call size
Softwood framing lumber is named for the rough, green size it had before it was dried and planed — not the size it ships at. Under the American Softwood Lumber Standard PS 20 (current edition PS 20-25, administered by the American Lumber Standard Committee), a nominal 2x4 is a dressed 1.5 x 3.5 in (38 x 89 mm), and has been since the size was fixed in 1964. A 2x6 is 1.5 x 5.5 in, a 2x8 is 1.5 x 7.25 in, a 1x4 is 0.75 x 3.5 in.
For each item, label the nominal call size and the actual dressed dimension, plus length, grade, and moisture condition (KD-19 or S-DRY means surfaced dry, at or below 19% moisture). Export buyers reading in millimetres need the metric dressed size spelled out — someone who expects 50 x 100 mm and receives 38 x 89 mm files a claim, not a reorder.
The common mistake is quoting only the nominal name to an international audience. Show the dressed size on the dimensional lumber sizes image and in the listing, so a builder can run his own load and layout math without a conversion email crossing an ocean and a time zone.
Brick and block: label the actual size and the modular nominal
Brick flips the logic: here the nominal size is bigger than the real brick, because it bakes in the mortar joint. A modular brick under ASTM C216 has an actual size of 3-5/8 x 2-1/4 x 7-5/8 in (about 92 x 57 x 194 mm) and a nominal size of 4 x 2-2/3 x 8 in. The rule is simply nominal = actual + mortar joint, and the 3/8 in joint is what makes brick coordinate on a 4-inch grid, per the Brick Industry Association. In Europe, EN 771 works the same way with a nominal 10 mm joint; the common Chinese GB standard brick is 240 x 115 x 53 mm.
Label both the actual (specified) size and the nominal or coordinating size, and state the mortar-joint allowance you assumed (3/8 in / 10 mm). A mason estimating course heights and brick counts works from the coordinating size; a buyer inspecting a sample measures the actual brick.
The common mistake is showing only the nominal 4 x 2-2/3 x 8 in. The buyer then measures a delivered brick, reads 7-5/8 in, and reports it as undersized — when it is exactly to standard. Put the actual dimensions on the image next to a link to your standard brick dimensions table and that false alarm never fires.
Profiles and pipe: label OD, wall, and the section
Pipe is the purest nominal trap: the number is neither the bore nor an exact diameter. NPS 2 (equivalently DN50) has an outside diameter of 2.375 in (60.3 mm) — not 2 in, not 50 mm — and the inside diameter changes with the wall thickness set by the Schedule, per the Nominal Pipe Size reference (ISO 6708 / ASME B36.10). For NPS 1/8 through 12, the NPS number and the true OD simply differ.
For pipe and tube, label the NPS/DN designation, the actual OD, the wall thickness or schedule (Sch 40, Sch 80), and the resulting ID — because two pipes with the same NPS and different schedules do not interchange. For extruded profiles, aluminium sections, and moldings, label the section width and height, the wall or web thickness, and the tolerance class, since extrusions carry real spread.
The common mistake is a listing that says "2-inch pipe" with no OD, no schedule, no wall. A fabricator cannot confirm a flange, a fitting, or a bracket will mate. Give the OD and schedule on the product image and the buyer specs it in one pass.
Summary: what to label on each material
| Material | Key dimensions to label | Standard reference | Common mistake |
|---|---|---|---|
| Ceramic / porcelain tile | Nominal size, work size (actual), thickness, rectified/calibrated + tolerance | ISO 13006 / EN 14411; ANSI A137.1 | Printing only nominal "600x600," hiding the 598 mm work size and thickness |
| Plywood / wood panels | Nominal + actual thickness, face size (4x8 ft / 1220x2440 mm), grade / span rating | PS 1-22, PS 2-18 (APA) | Calling it "3/4 in" without the 23/32 in (~18.3 mm) actual thickness |
| Dimensional lumber | Nominal call size + actual dressed size, length, grade, moisture (KD/S-DRY) | PS 20-25 (ALSC) | Quoting "2x4" only; buyer expects 50x100 mm, receives 38x89 mm |
| Brick / block | Actual (specified) size + modular nominal, assumed mortar joint | ASTM C216 / EN 771 / GB | Showing only nominal 4 x 2-2/3 x 8 in, so the real 3-5/8 in looks undersized |
| Profiles / pipe | NPS/DN designation, OD, wall / schedule, resulting ID + tolerance | ISO 6708; ASME B36.10 | "2-inch pipe" with no OD (60.3 mm) and no schedule |
A checklist to label building material dimensions on your product images
Run every listing through this before it goes live. It is how to show dimensions on building products so a buyer can spec without contacting you.
- State both the nominal/call size and the actual measured size on the image itself
- Give thickness, height, or wall separately — never make the buyer infer it
- Show units in both systems (in and mm) for export buyers
- Cite the governing standard number (ISO 13006, PS 1, PS 20, ASTM C216, DN/NPS)
- State the tolerance or class (±mm, caliber, rectified, Schedule 40/80)
- Note the mortar-joint or grout allowance wherever the nominal size assumes one
- Keep the dimension text on the image, not only buried in the product description
- Use one consistent leader-line and label style across the whole catalog
Put the numbers on the image, in minutes
If your building material product images still show only a photo, you are converting fewer inquiries than your product deserves — every unanswered dimension is a buyer who moved to a supplier whose listing did the spec work for him. You do not need a CAD department to label building material dimensions properly. A dimension and spec annotation tool drops calibrated leader lines, nominal-and-actual callouts, thickness, tolerance, and the standard reference onto your existing photos, in both inches and millimetres, in minutes. Build one labeled spec diagram per SKU, reuse the style across the catalog, and let the image answer the question before the buyer has to ask it. That is the difference between a photo that gets admired and a product image that gets ordered.
FAQ
What size should I label ceramic tile?
Label both the nominal size and the work size, plus thickness and edge type. A tile sold as 600 x 600 mm usually has a 598 mm work size under ISO 13006 / EN 14411, with the 2 mm reserved for the grout joint. Add the thickness (typically 9-11 mm) and whether the tile is rectified or has a natural cushion edge, so the buyer can plan the joint width correctly.
What is the actual thickness of 3/4 inch plywood?
The actual thickness of nominal 3/4-inch plywood is 23/32 inch — 0.71875 in, about 18.3 mm — under the PS 1 plywood standard, because the panel is sanded after pressing. Sanded panels hold a tolerance of roughly ±1/32 in (±0.8 mm). Always print the actual thickness on the image, since it is the number that determines fit in grooves and hardware.
Why isn't a 2x4 actually 2 by 4 inches?
Because "2x4" is the nominal name for the rough, green size before the board is dried and planed. The actual dressed size is 1.5 x 3.5 in (38 x 89 mm), fixed by the American Softwood Lumber Standard PS 20 since 1964. This is the textbook case of nominal vs actual size, and both figures belong on the listing.
Should building material product images show nominal or actual dimensions?
Both. The nominal size names the product and drives modular coordination; the actual size is what the buyer measures and installs. Showing only one causes the two classic failures — a "3/4-inch" panel that is really 23/32 in, or a nominal brick that looks undersized when measured. Put nominal and actual side by side on every image.
How do I show dimensions on building products for export buyers?
Give every dimension in both inches and millimetres, cite the governing standard number, and state the tolerance class. An importer reading "2x4" may expect 50 x 100 mm and be surprised by 38 x 89 mm; an importer who sees "nominal 2x4 / actual 38 x 89 mm (PS 20)" specs it correctly the first time. Dual units plus a standard reference removes the guesswork that kills cross-border inquiries.
Sources & References
- Tile Council of North America — ceramic tile standards and ANSI committees (ISO 13006 / ANSI A137.1)
- APA - The Engineered Wood Association — plywood standards PS 1 and PS 2
- NIST — Voluntary Product Standards Program (PS 1-22 plywood, PS 20-25 softwood lumber)
- American Lumber Standard Committee — administrator of the American Softwood Lumber Standard PS 20
- Brick Industry Association — Technical Note on dimensioning and estimating brick masonry (ASTM C216)
- Nominal Pipe Size (NPS) and DN reference (ISO 6708 / ASME B36.10)